
From the street, this front door in Bells Corners looked fine. Navy paint, a leaded glass insert, clean white trim. Then we pulled the threshold, and the wood underneath came apart in our hands.
We removed the old door and frame, cut out the rotted sill framing, rebuilt the opening, flashed the sill, installed a new Masonite half-glass door and finished it with a keypad deadbolt. Here’s the before, the mess in the middle and the after.
Project snapshot
- Location
- Bells Corners, Ottawa
- Entry
- Front door, recessed in a brick alcove under a roof overhang
- Problem
- Long-term water damage to the sill framing and lower jamb
- Work done
- Frame removal, sill and rough opening rebuild, sill flashing, new pre-hung door, exterior capping, keypad deadbolt
- New door
- Masonite half-glass exterior door with grilles
- Hardware
- Matte black keypad deadbolt and grip handleset
Before: a door that looked better than it was
This is the door we were called to look at. Nothing about it says rot. The paint was in decent shape, the glass was intact and the trim had been kept up.
That’s the trouble with water damage at an entry door. It starts at the bottom, under the threshold and behind the trim, where nobody looks. By the time you see it from the outside, it has usually been going on for years.
The homeowner had noticed signs of water at the bottom of the door. What we found once we opened it up was a lot worse than the door face suggested.
What we found under the threshold
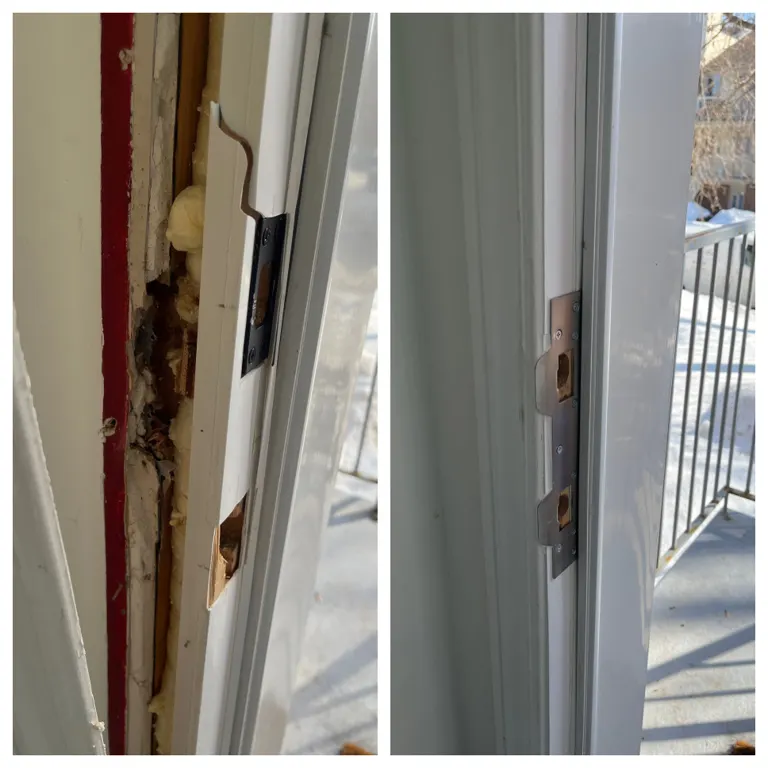
Once the aluminum threshold came up, the sill framing underneath was gone. Not soft. Gone.

The wood was black and crumbling, with old spray foam stuck to what was left of it. There were insects living in it, which tells you the moisture had been sitting there for a long time.

The bottom of the side jamb had rotted through behind the trim.

On the outside, we found layer after layer of caulking. Someone had been sealing that gap again and again. Caulking slows water down. It doesn’t stop it, and it can trap moisture behind it once the wood starts to break down.

Water finds the corners where the threshold meets the jambs first. Once that corner softens, the rest of the sill and lower jamb follow.
Why this happens to Ottawa doors
This entry is recessed in a brick alcove with a roof overhang above it, so it doesn’t take much direct rain. The water came from below and from the sides. Snow piles against the sill every winter. Snowmelt and rain splash back off the concrete step. Water finds the corners where the threshold meets the jambs, and once it’s in, it has nowhere to go.
Ottawa’s freeze-thaw cycle does the rest. Water in a small gap freezes, expands and makes the gap a little bigger. Repeat that a few dozen times every winter for a decade, and a hairline crack in the caulking turns into a rotted sill.

With the frame out, the full picture was clear. The rot ran the width of the opening under the sill. A new door set on that framing would have had nothing solid to sit on or fasten into, and it would have failed within a few seasons.
The repair, step by step
1. Removing the old door and frame. We took out the door slab, the jambs, the threshold and the exterior trim, down to the rough framing. Pulling the whole frame is the only way to see how far rot goes.

With the slab and jambs out of the way, the rough opening showed how far the damage had travelled into the sill area — past anything a surface patch could have fixed.

2. Cutting out the rot. We removed every piece of soft and blackened wood from the sill area and checked the framing around it until we hit solid material. We then rebuilt the sill with new pressure-treated lumber.
3. Flashing the sill. This is the step that gets skipped on a lot of door installs, and it’s the reason many of them rot again.

Flashing the sill properly means wrapping the new sill in self-adhered waterproofing membrane and running it up the sides of the opening, so any water that gets past the door drains out instead of soaking into the framing.
4. Squaring the rough opening. We added new wood to the sides of the opening and fastened the header so the new frame would have solid, straight material to sit against.

A door hung in a racked or soft opening never stays square for long. Getting the header and sides true first is what lets the new pre-hung unit close and lock without fighting the frame.

5. Installing the new door. The new Masonite pre-hung door went in plumb, level and square, shimmed at the hinge and latch points and fastened through to the framing. We insulated the gap between the frame and the rough opening and set the new aluminum sill.
6. Capping and sealing the exterior. We capped the exterior trim and the subsill in white aluminum, so there’s no bare wood left facing the weather, then sealed the frame to the brick.
7. Installing the keypad deadbolt. The old door had a lever and a separate keyed deadbolt. The homeowner wanted keyless entry, so we installed a matte black keypad deadbolt with a matching grip handleset. We tested the bolt throw with the door closed and set it up with the homeowner before we left.
A keypad lock only works well on a door that’s square in its frame. If the door sags or the frame is out, the bolt drags on the strike and the motor or mechanism wears out early. That’s one more reason we rebuild the opening properly instead of forcing a new door into an old frame.
After: the finished entry

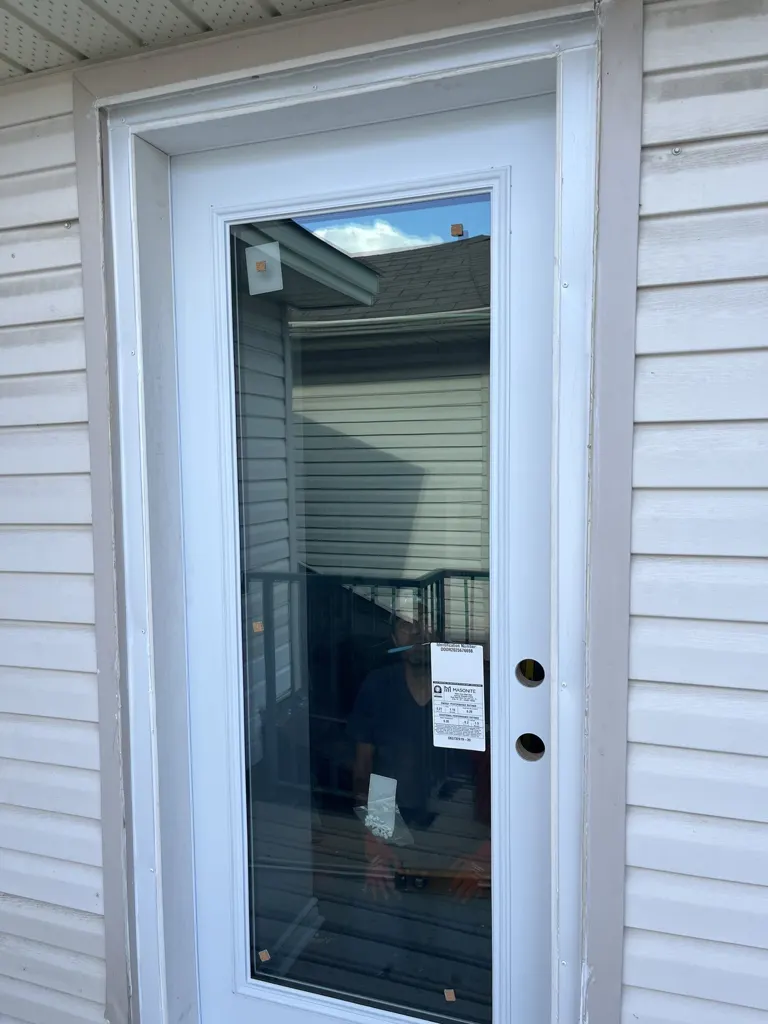
The new door is white with a half-glass insert, a six-lite grille and two raised panels below. It lets in more light than the old leaded insert. It closes with a light push, the deadbolt throws without anyone lifting or leaning on the door, and there’s no daylight at the threshold.
Under the new sill is solid framing wrapped in membrane, not wood that’s been rotting for years. And nobody in the house needs to carry a key to the front door anymore.
Signs your door has the same problem
- Paint bubbling or peeling along the bottom of the door or the trim
- A threshold that flexes, rocks or sounds hollow when you step on it
- Soft spots at the bottom of the jamb when you press with a screwdriver
- Caulking that has been redone more than once in the same spot
- A deadbolt that only locks if you push or lift the door
- Drafts, daylight or water at the bottom corners after rain or snowmelt
- Dark staining on the floor or subfloor just inside the door
If you see two or more of these, the damage is probably past the surface.
Repair or replace?
Not every water-damaged door needs to be replaced. If the rot is limited to the bottom of a jamb or the trim, we can often cut out the damaged section and splice in new material, then reseal. That costs far less than a new door.
In this case, replacement was the right call. The sill framing had failed across the full width of the opening, and the jamb was rotted through. Repairing the frame around the old door would have meant rebuilding most of it anyway, on a door that was already out of square. A new pre-hung door on a rebuilt, flashed opening was the fix that would last.
We’ll tell you which one your door needs after we’ve looked at it, not before.
Door repair and replacement in Bells Corners
If your front door looks fine but doesn’t close, lock or seal the way it used to, the problem may be under the threshold. We’ll open it up, show you what we find and give you a straight answer on repair versus replacement.
Call 613-265-3667 or use the quote form to book a visit.
Related Services
Need a similar repair?
Send a photo of the bottom of your door, the threshold and any soft spots at the jamb — we’ll tell you whether you’re looking at a splice repair or a full replacement.